
Why Cross-Contamination Prevention is Critical for Public Health
Prevent cross contamination is essential for protecting public health and safety in every environment where people handle food, medical supplies, or shared surfaces. Cross-contamination occurs when harmful bacteria, viruses, or allergens transfer from one person, object, or surface to another, often invisibly and without warning.
Key steps to prevent cross-contamination:
- Clean – Wash hands, utensils, and surfaces frequently with soap and water
- Separate – Use different cutting boards and utensils for raw and ready-to-eat foods
- Cook – Heat foods to safe internal temperatures to kill harmful bacteria
- Chill – Refrigerate perishable foods within 2 hours to slow bacterial growth
- Sanitize – Disinfect high-touch surfaces regularly, especially after contact with raw foods
The stakes are higher than many people realize. An estimated 1 in 6 Americans will get sick from food poisoning this year alone, with 128,000 hospitalizations and 3,000 deaths annually from foodborne illness. Yet research shows that only 32% of people clean and sanitize surfaces used to prepare raw meat – a gap that puts families and communities at unnecessary risk.
Whether you’re managing a home kitchen, overseeing a healthcare facility, or running a commercial food operation, understanding how germs spread and implementing proven prevention strategies can mean the difference between safety and serious illness.
I’m Debra Vanderhoff, Founder and COO of MicroLumix Bioscience Technology, where we develop automated disinfection systems to help healthcare facilities prevent cross contamination at high-volume touchpoints. My 20+ years in biotechnology and healthcare operations have shown me how the right prevention strategies can save lives and protect vulnerable populations.

The Dangers of Invisible Threats: Understanding Cross-Contamination
Think about the last time you prepared dinner. You probably handled raw chicken, chopped vegetables, and maybe grabbed a snack along the way. What you couldn’t see were the millions of harmful bacteria and viruses potentially hitching a ride on your hands, utensils, and surfaces throughout that process.
When we talk about why it’s so important to prevent cross contamination, we’re really talking about stopping these invisible hitchhikers from making people sick. Cross-contamination happens when dangerous microorganisms like bacteria, viruses, and parasites jump from one place to another – sometimes directly when raw meat drips onto your salad greens, and sometimes indirectly when you use that cutting board you forgot to wash between the chicken and the vegetables.
But it’s not just about germs. Allergens can cross-contaminate too, turning a safe meal into a dangerous one for someone with food allergies. Even tiny traces of peanuts or shellfish can cause severe reactions when they accidentally transfer to other foods.
Why is Cross-Contamination a Problem?
Here’s where the numbers get sobering. According to the CDC’s foodborne illness statistics, 48 million Americans get food poisoning every year. That’s roughly 1 in 6 people – maybe even someone in your own family.
These aren’t just cases of feeling a little queasy after dinner. Food poisoning leads to 128,000 hospitalizations and tragically, 3,000 deaths annually. The reality is that what starts as invisible contamination in a kitchen can end up as a medical emergency.
Vulnerable populations face the highest risks. Young children, pregnant women, adults over 65, and anyone with a compromised immune system can develop serious complications from contamination that might only cause mild discomfort in healthy adults. For these groups, preventing cross-contamination isn’t just about comfort – it’s about survival.
The economic impact extends far beyond individual medical bills. Businesses face devastating losses from contamination incidents, and our healthcare system spends billions treating preventable foodborne illnesses. You can find more details about these impacts in the CDC’s food poisoning facts.
Common Ways Cross-Contamination Occurs
The tricky thing about contamination is how easily it happens through everyday actions. Raw meat juices are probably the biggest culprit – they contain concentrated bacteria that can spread to anything they touch. When chicken drips in your shopping cart or refrigerator, those germs are looking for their next destination.
Unwashed hands act like tiny germ highways, carrying contamination from raw foods to clean surfaces, utensils, and ready-to-eat foods. It’s amazing how much damage can happen in the few seconds it takes to grab a piece of bread after handling raw meat.
Dirty utensils and cutting boards create another common pathway. That knife you used for raw fish becomes a contamination tool when you use it to slice tomatoes without washing it first. The same goes for cutting boards – they’re like germ parking lots if not properly cleaned between uses.
Even your contaminated surfaces can betray you. Kitchen counters, sinks, and especially those innocent-looking dishcloths can harbor bacteria for hours or even days. Reused cleaning cloths are particularly sneaky – they seem helpful, but they’re actually spreading germs from surface to surface if not changed and sanitized regularly.
Improper food storage rounds out the major contamination pathways. When you store raw meat above ready-to-eat foods in the refrigerator, gravity becomes your enemy. Those drips that seem so minor can carry enough bacteria to cause serious illness.
The good news? Once you understand these common pathways for direct contact and indirect contact contamination, you can take simple steps to break the chain and keep your family safe.
The 4 Pillars to Prevent Cross-Contamination in Your Kitchen
Think of food safety like building a house – you need a strong foundation to keep everything secure. When it comes to keeping your family safe from foodborne illness, that foundation rests on four simple but powerful pillars that food safety experts have refined over decades of research.
The USDA has made this refreshingly straightforward with their proven approach: Clean, Separate, Cook, and Chill. These aren’t just fancy guidelines gathering dust in some government manual – they’re your everyday toolkit to prevent cross contamination and keep dangerous bacteria from crashing your dinner party.
What I love about this approach is how it takes something that could feel overwhelming and breaks it down into manageable, memorable steps. You don’t need a food science degree to master these basics – just consistent habits that become second nature. For comprehensive guidance on safe food handling, the USDA’s Food Safety Basics provides excellent detailed information.

Clean: Wash Hands, Utensils, and Surfaces Often
Here’s the truth about germs – they’re incredibly good at hitchhiking. They’ll hop from your hands to your cutting board to your favorite wooden spoon faster than you can say “food poisoning.” That’s why cleaning becomes your first and most important defense.
Proper handwashing is where it all starts, and I mean really proper handwashing. We’re talking about more than a quick rinse under lukewarm water. Use plain soap and water – no need for fancy antibacterial versions that promise the moon. Wet your hands, apply soap, then scrub for a full 20 seconds. If you need a timer, hum “Happy Birthday” twice from start to finish.
Don’t forget those sneaky spots where germs love to hide: the backs of your hands, between your fingers, and under your nails. After a thorough scrub, rinse completely and dry with a clean towel. The CDC’s guidance on when and how to wash your hands is incredibly helpful for timing.
Wash your hands before, during, and after preparing food, especially after handling raw meat, poultry, seafood, or eggs. Also wash after using the bathroom, changing diapers, or petting your dog – basically, when in doubt, wash them out!
Surface and utensil cleaning requires the same attention to detail. After each use – and this is especially crucial after preparing raw meat, poultry, seafood, or eggs – wash cutting boards, dishes, utensils, and countertops with hot, soapy water. Use paper towels or clean cloths for spills, and toss dishcloths in your washing machine’s hot cycle regularly.
When it comes to washing produce, always rinse fruits and vegetables under running water without soap, bleach, or commercial washes. Do this even before peeling or cutting. For firm produce like melons or cucumbers, scrub with a clean brush. Here’s what might surprise you: never wash raw meat, poultry, eggs, or seafood. This actually spreads harmful germs around your kitchen like confetti at a party you definitely don’t want to throw. The CDC’s tips on washing fruits and vegetables provides excellent guidance.
Separate: Don’t Let Germs Spread
Separation might sound dramatic, but think of it as creating safe zones in your kitchen. Raw foods and ready-to-eat foods should live in different worlds until cooking transforms raw ingredients into safe, delicious meals.
Color-coded cutting boards are a game-changer for busy kitchens. Use one cutting board for fresh produce and foods that won’t be cooked, and a completely separate one for raw meat, poultry, and seafood. Many families use green for vegetables and red for raw meat – it’s simple, visual, and hard to forget.
The same separation rule applies to plates and utensils. If a plate held raw chicken, it needs a thorough washing before cooked food touches it. No exceptions, no shortcuts. The FDA’s tips on separating foods offers additional practical guidance.
Refrigerator storage follows a simple “top to bottom” safety rule. Store raw meat, poultry, and seafood in containers or sealed plastic bags on the bottom shelf. This prevents their juices from dripping onto other foods like an unwelcome surprise. Keep eggs in their original carton in the main refrigerator compartment, not the door where temperatures fluctuate.
Smart shopping habits start the separation process before you even get home. In your grocery cart, keep raw meat, poultry, and seafood in plastic bags and away from other foods. Continue this practice at checkout and when bagging groceries.
Cook: Use the Right Temperature
Cooking isn’t just about making food taste good – it’s your most powerful weapon against harmful bacteria. Heat kills germs, but only when you reach the right temperatures for the right amount of time.
A food thermometer is absolutely essential – it’s the only reliable way to know your food is safely cooked. Color and texture can fool you, but temperature doesn’t lie. Insert the thermometer into the thickest part of the food, avoiding bone, fat, or gristle.
Safe internal temperatures vary by food type, and memorizing them all isn’t realistic. Ground meats need to reach 160°F, while poultry requires 165°F. Keep a Minimum Cooking Temperatures Chart handy in your kitchen for quick reference.
Understanding the temperature danger zone between 40°F and 140°F is crucial because harmful bacteria multiply fastest in this range. Your goal is to minimize the time food spends in this danger zone.
Reheating leftovers requires bringing them to 165°F throughout. If you’re using a microwave, stir food halfway through heating to eliminate cold spots where bacteria might survive.
Chill: Refrigerate and Freeze Food Properly
Proper chilling is like hitting the pause button on bacterial growth. Cold temperatures don’t kill germs, but they dramatically slow their multiplication, buying you time to safely prepare and enjoy your food.
The 2-hour rule is non-negotiable: refrigerate perishable foods within 2 hours of preparation or purchase. On hot days above 90°F, you only have 1 hour. This “golden window” is your safety net against rapid bacterial growth.
Temperature control requires setting your refrigerator to 40°F or below and your freezer to 0°F or below. These aren’t suggestions – they’re the temperatures that keep harmful bacteria in check.
Safe thawing methods never include leaving food on the counter. Thaw in the refrigerator, in cold water (changing the water every 30 minutes), or in the microwave if you’re cooking immediately afterward. For detailed guidance, check out these safe thawing methods.
Leftover storage works best in shallow containers that cool quickly, helping food escape the temperature danger zone faster. Always cover leftovers to prevent contamination from other refrigerator items.
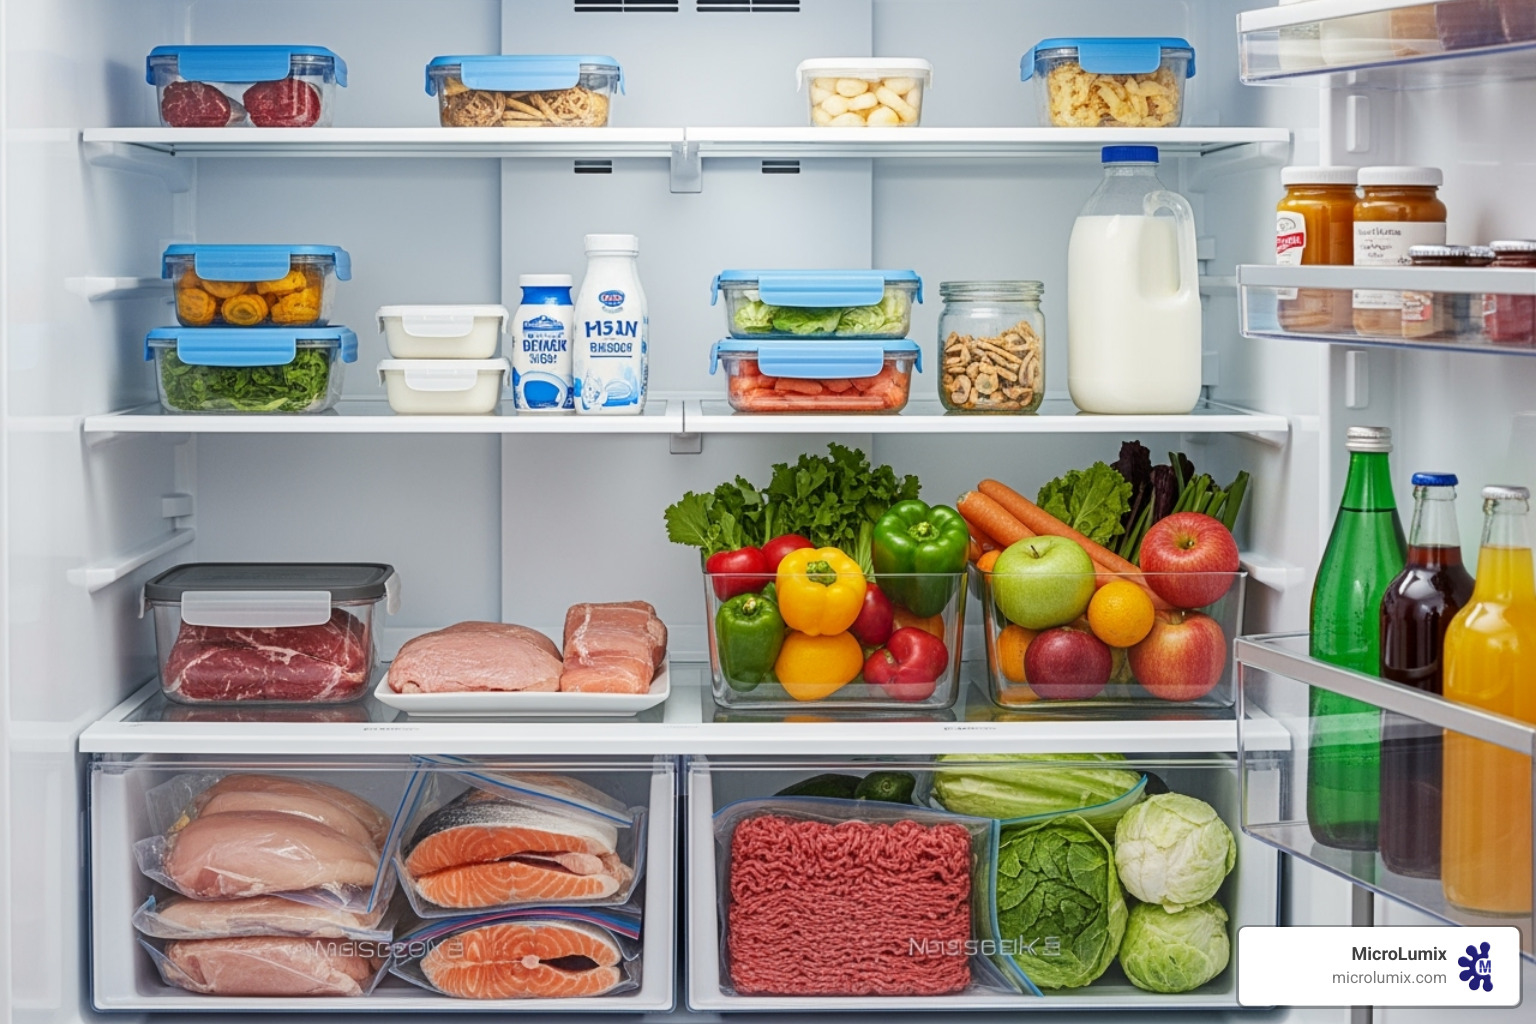
By consistently applying these four pillars, you’re not just following rules – you’re creating a culture of safety that protects everyone who enjoys meals prepared in your kitchen. These habits become automatic with practice, turning food safety into a natural part of your cooking routine.
Mastering the Clean Sweep: Cleaning vs. Sanitizing vs. Disinfecting
When we’re working to prevent cross contamination, it’s easy to think that cleaning, sanitizing, and disinfecting are all the same thing. But here’s the truth: they’re actually three distinct steps, each with its own superpower in the fight against germs. Understanding these differences isn’t just helpful – it’s essential for truly protecting yourself and your family.
The USDA puts it perfectly when they talk about the “Clean THEN Sanitize” approach. Think of it as a one-two punch that knocks out foodborne illness in your kitchen. But there’s actually a third player in this game: disinfecting.
Cleaning is your foundation. This is where you roll up your sleeves and physically remove the stuff you can see – dirt, grease, food particles, and yes, some bacteria too. You’re using good old-fashioned elbow grease combined with soap or detergent. It’s like clearing the stage before the real performance begins.
Sanitizing takes things up a notch. Once your surfaces are clean, sanitizing reduces the number of harmful microorganisms to levels that public health standards consider safe. You’ll typically use chemical sanitizers like diluted bleach solutions or quaternary ammonium compounds. Some people also use heat – think hot water or steam.
Disinfecting is the heavy hitter. This step kills nearly all bacteria, viruses, and fungi on surfaces. It uses stronger chemical disinfectants like bleach, hydrogen peroxide, or specialized quaternary ammonium compounds. The key here is contact time – these products need to sit on the surface for a specific amount of time to do their job properly.
Here’s what makes each method unique:
| Process | Purpose | Method | Common Use Cases |
|---|---|---|---|
| Cleaning | Physically removes dirt, grime, and some bacteria | Mechanical action (scrubbing, wiping) with soap or detergent | Daily kitchen cleanup, wiping counters, washing dishes |
| Sanitizing | Reduces harmful microorganisms to safe levels | Chemical sanitizers or heat application | Food-contact surfaces, cutting boards after raw meat prep |
| Disinfecting | Kills nearly all bacteria, viruses, and fungi | Strong chemical disinfectants with specific contact times | High-touch surfaces, bathroom fixtures, medical equipment |
The magic happens when you use these steps in the right order. Clean first to remove the visible debris – sanitizers and disinfectants can’t work effectively on dirty surfaces. Then sanitize or disinfect depending on your needs and the level of protection required.
For most home kitchens, the clean-then-sanitize approach works beautifully for food-contact surfaces. But for high-touch areas like door handles, light switches, and phones, you might want to go the full distance with disinfecting, especially during flu season or when someone in your household is sick.
Each step builds on the previous one. You can’t skip cleaning and expect sanitizing or disinfecting to work properly. It’s like trying to paint over dirt – the end result just won’t be what you’re hoping for.